About Windows Boot Manager not showing in BIOS, Boot Configuration Data (BCD) is usually at fault so you may want to rebuild it. Also, you should consider repairing Master Boot Record (MBR), using Startup Repair, disconnecting external devices, clean installing Windows, changing the boot sequence and updating BIOS. Not exactly tech-savvy and could use some help? In that case, this article is for you.
Windows Boot Manager Not Showing in BIOS: Culprits

It’s not uncommon for Windows software to go haywire but regarding Windows Boot Manager not showing in BIOS, you should remember the following suspects:
- Boot Configuration Data (BCD).
- Master Boot Record (MBR).
- Corruption.
- External devices.
- Boot sequence.
- Windows.
- BIOS.
Actions To Take
Note: Generally speaking, Windows could bug out all of a sudden in use and cause a lot of problems. Therefore, regarding Windows Boot Manager not showing in BIOS, it’s wise to restart your computer at least once before resorting to the solutions down below.
Rebuild Boot Configuration Data (BCD)
- Step 1: Shut down your computer by long-pressing the power button.
- Step 2: Turn on your computer and as Windows begins to load, long-press the power button to shut it down again.
- Step 3: Repeat the process until you get to Windows Recovery Environment (WinRE).
- Step 4: In Advanced options screen, select Troubleshoot, choose Advanced options and hit Command Prompt.
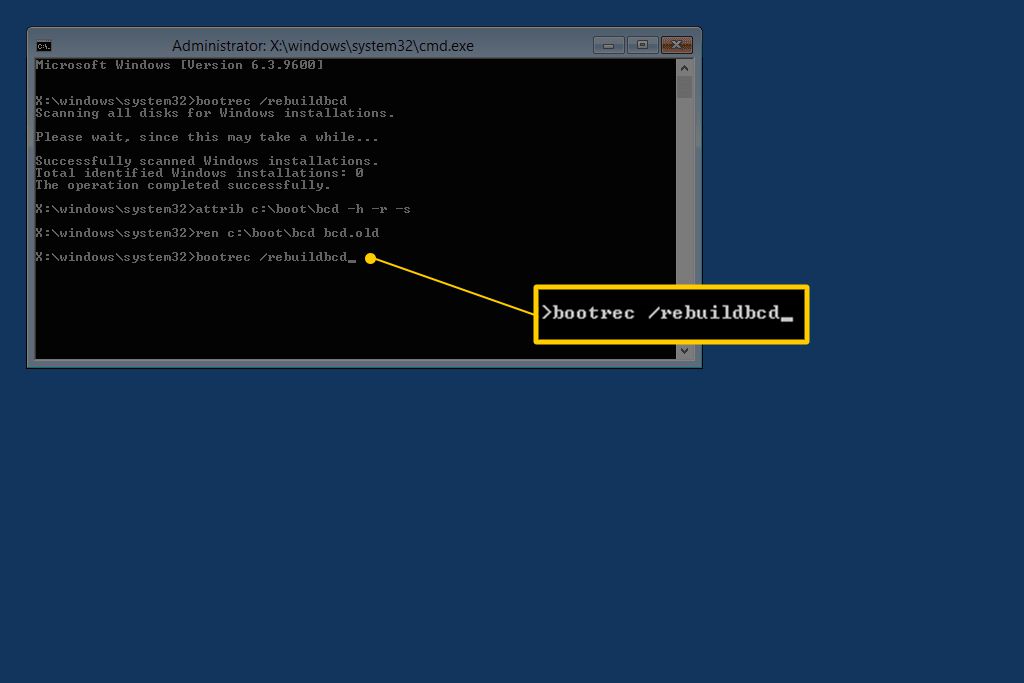
- Step 5: Proceed to run the command bootrec /rebuildbcd in Command Prompt. If a Windows installation is identified, type Yes and press Enter to add it to the boot list then restart your computer. On the other hand, if no Windows installation is identified, run each of these commands in Command Prompt:
- bcdedit /export c:\bcdbackup amd
- attrib c:\boot\bcd -h -r -s
- ren c:\boot\bcd bcd.old
- bootrec /rebuildbcd
Command Prompt returns a line saying that a Windows installation is identified? Then all you have to do is to type Yes, press Enter and restart your computer.
Repair Master Boot Record (MBR)
- Step 1: Shut down your computer by long-pressing the power button.
- Step 2: Turn on your computer and as Windows begins to load, long-press the power button to shut it down again.
- Step 3: Repeat the process until you get to Windows Recovery Environment (WinRE).
- Step 4: In Choose an option screen, select Troubleshoot, choose Advanced options and hit Command Prompt.
- Step 5: Run these commands in Command Prompt:
- bootrec /fixmbr
- bootrec /fixboot
- bootrec /scanos
- bootrec /rebuildbcd
Last but not least, restart your computer.
Make Use Of Startup Repair
- Step 1: Shut down your computer by long-pressing the power button.
- Step 2: Turn on your computer and as Windows begins to load, long-press the power button to shut it down again.
- Step 3: Repeat the process until you get to Windows Recovery Environment (WinRE).
- Step 4: In Choose an option screen, select Troubleshoot, choose Advanced Options and hit Startup Repair.
- Step 5: Allow the process to go all the way then restart your computer.
Disconnect External Devices
Disconnect all external devices including USB flash drives, hard drives and so on. After you finish, restart your computer and witness the result.
Change The Boot Sequence
- Step 1: Restart your computer
- Step 2: As Windows starts up, press the BIOS key (F2, F8, F10, F12, Esc, Del, …) to open the BIOS menu.
- Step 3: In BIOS tab, modify the boot sequence so your hard drive is the first boot device. Last but not least, save, exit BIOS and restart your computer.
Clean Install Windows
- Step 1: Go to another computer, launch the web browser and visit Microsoft’s official website.
- Step 2: Download the Media Creation Tool in Software Download then move the tool to a flash drive.
- Step 3: Run the tool, select Create installation media for another PC and choose New User Account, version, type of media… Of course, you have to use flash drive for installation media. Next, unplug the drive from its current computer and plug it into your computer. Proceed to turn on your computer and when Windows begins loading, press the BIOS key to open the BIOS menu.
- Step 4: Change the boot sequence to the flash drive so installation media could load up first. Once everything is to your liking, save the changes and restart your computer. When the screen comes back on, follow onscreen instructions to wrap up the installation of Windows 10.
Update BIOS
To determine whether an update is necessary, you must take a look at two things:
- The BIOS version on your PC.
- The latest BIOS version available on the website of the manufacturer of your motherboard.
If you deem that your BIOS version is out-of-date, download the BIOS update from the website, run it and follow onscreen instructions. The moment the update completes, restart your computer and see how things turn out.
Commonly Seen Questions
How do I check out my current BIOS version?
- Step 1: Press Windows key.
- Step 2: Type msinfo32 then hit Enter.
- Step 3: Note down BIOS Version/Date details.
What must be done to address ACPI errors in BIOS?
Once it comes to ACPI errors, solutions include:
- Update BIOSs.
- Update drivers.
- Disable/uninstall ACPI
- Launch Windows in UEFI mode

I am Anshul Rana, an experienced author specializing in PC gear reviews and Windows 10 software tutorials. With a strong passion for technology and an in-depth understanding of the PC industry, I provide insightful and detailed analyses of computer peripherals, gaming gear, and software solutions. My writing style is concise yet informative, making complex topics accessible to both beginners and advanced users. Through my reviews and tutorials, I aim to offer valuable guidance, helping readers make informed decisions to enhance their PC experience and explore the vast possibilities of Windows 10 software.