You want to print pictures and put them in wallets but don’t know much about the measurements for wallet-size photo? In that case, this article is exactly what you need. Down below is everything that you must keep in mind about wallet-size photos as well as their measurements. Read to the end to be able to print pictures for wallets at your leisure.
The Size Of Wallet-Size Photos: Overview
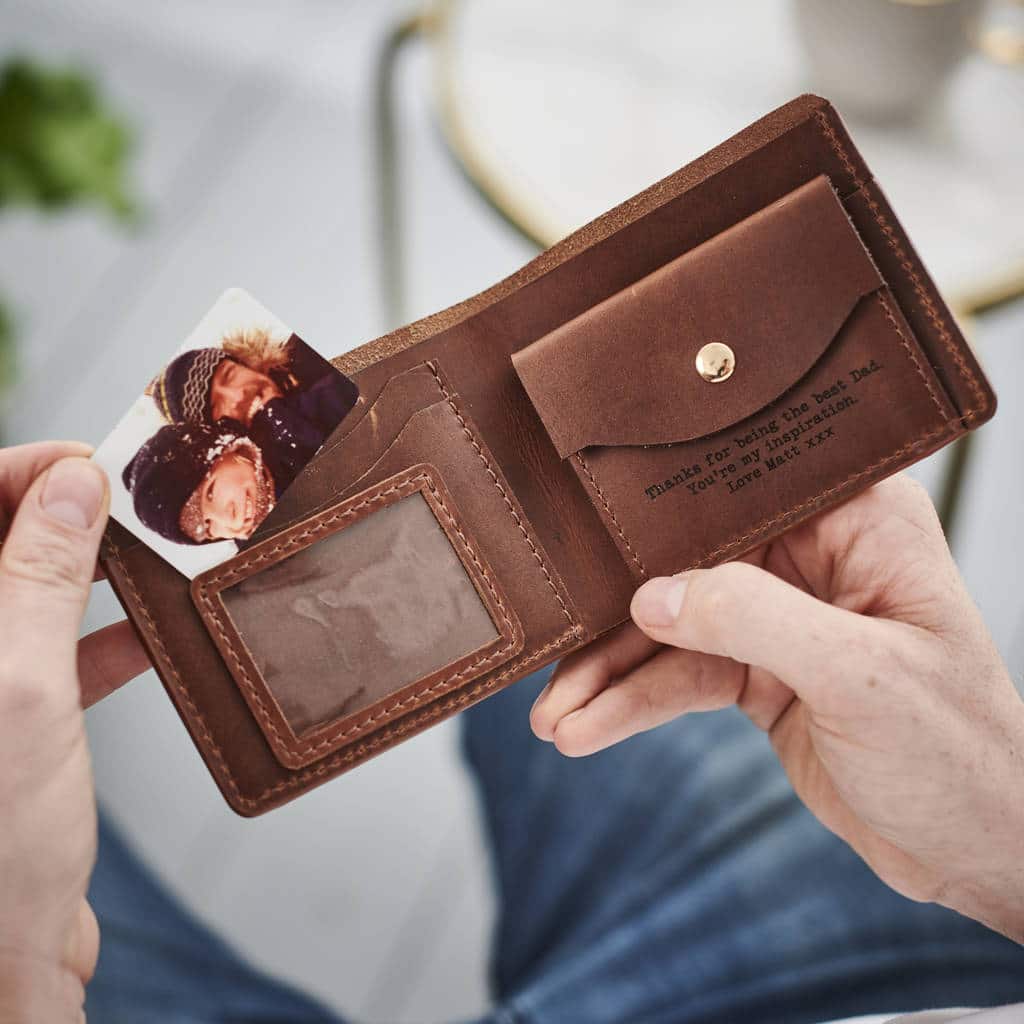
Generally speaking, the average wallet consists of a cash compartment and several slots for your credit cards, ID, … Since one of the slots should have a clear plastic window, people may keep photos inside their wallet. Nowadays, manufacturers release wallets of variable dimensions so the size of the plastic windows may vary between models. Still, the standard size for a wallet photo is 2.0 X 3.0 inches. In the case that you use centimeters/millimeters, the measurements for wallet-size photo should be 5.08 X 7.62 centimeters/50.8 X 76.2 millimeters.
How To Make Wallet-Size Photos Using Microsoft Word
Now that we’ve discussed the measurements for wallet-size photos, let’s look at how you can create one using Microsoft Word.
- Step 1: Prepare the image that you want to use for the wallet photo. If the photo is on another device, move it to your computer. After the preparation finishes, open Microsoft Word.
- Step 2: Click File, pick New and hit Blank Document
- Step 3: Select Insert, hover your mouse over Pictures and choose This Device. Next, click the image you want to use then pick Insert to insert the image into your document.
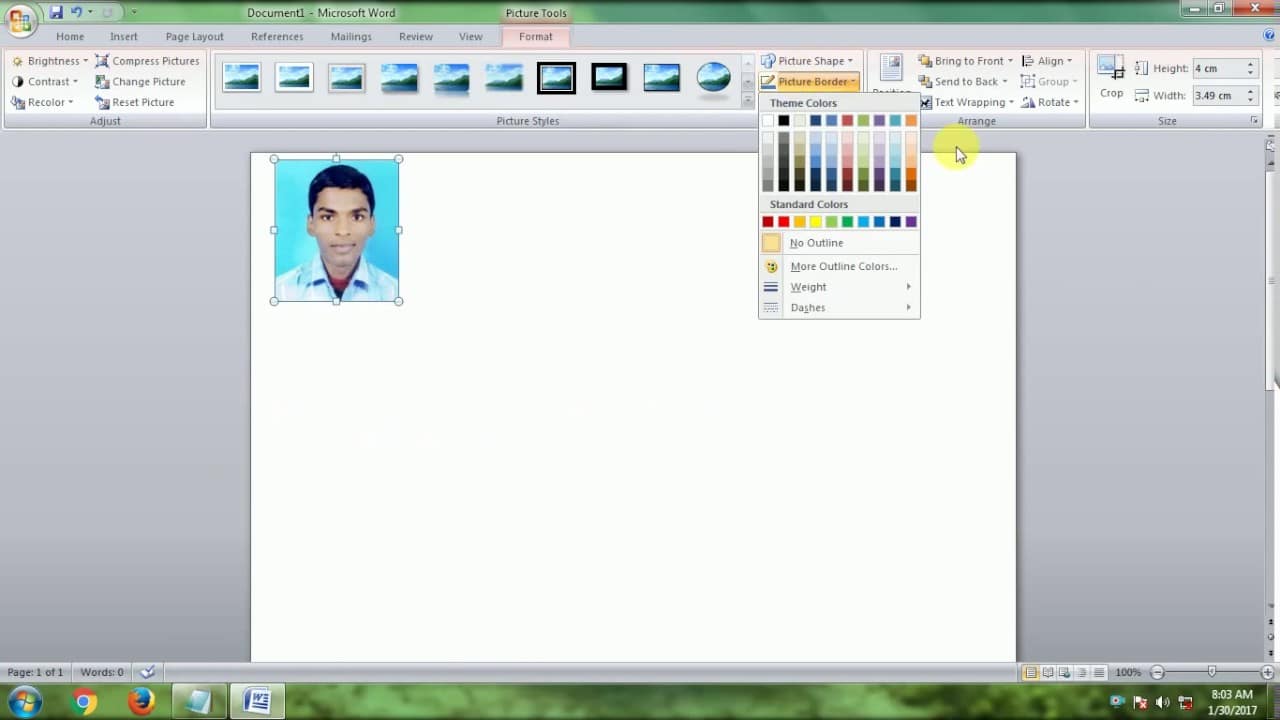
- Step 4: With the image selected, go to the Picture Format menu and hit Crop. Proceed to adjust the size as follows: 7.62 cm for height and 5.08 cm for width. That is going to resize the photo to 2” X 3”. Hit crop to complete the process.
- Step 5: Press Ctrl + S to save the image and Ctrl + P to print it.
Frequently Asked Questions
What image editing options can I use in Microsoft Word?
Microsoft Word allows you to use all sorts of options to edit images. Some of the most common ones include:
- Picture Layout: Via this feature, you can convert your image into a SmartArt graphic to resize, arrange, and caption it.
- Picture Effects: Via this feature, you can add visual effects such as glow, reflection, and shadow to your image.
- Picture Border: Via this feature, you can choose the line style, width, and color of the outline or border.
- Picture Frames: Via this feature, you can drop shadows or add frames to your picture.
- Artistic effects: Via this feature, you can add special effects to your image and make it look like a painting or a sketch.
- Color: Via this feature, you can optimize the quality of the picture’s color
- Corrections: Via this feature, you can modify your photo’s sharpness, brightness, and contrast.
- Remove Background: Via this feature, you can erase your photo’s background with a single click.
How do I save a wallet-size photo as PNG or JPEG?
One of the benefits of using Microsoft Word to create wallet-size photos is it provides various formats to save the image. In addition to saving the image as a Word document, you can also save it in PNG and JPEG file formats.
To save your wallet-size photo as PNG or JPEG, follow the steps below:
- Step 1: Once you’ve created the wallet-size photo on Microsoft Word, double-click on it to open the Picture Format menu.
- Step 2: Click on Compress Pictures. On the pop-up window, Mark the checkbox next to “Delete cropped areas of pictures”, then select your desired resolution and click OK to apply the changes.
- Step 3: Right-click on the picture, then click on “Save as Picture”.
- Step 4: Click the drop-down arrow next to “Save as type”, then select JPEG File Interchange Format or Portable Network Graphics (PNG), depending on the format you want to use.

I am Anshul Rana, an experienced author specializing in PC gear reviews and Windows 10 software tutorials. With a strong passion for technology and an in-depth understanding of the PC industry, I provide insightful and detailed analyses of computer peripherals, gaming gear, and software solutions. My writing style is concise yet informative, making complex topics accessible to both beginners and advanced users. Through my reviews and tutorials, I aim to offer valuable guidance, helping readers make informed decisions to enhance their PC experience and explore the vast possibilities of Windows 10 software.