Do you know that you could increase the speed of your computer without adding more RAM? Yes, you heard that right! You could get an old laptop to not just run faster but also boot quicker with a few simple tweaks to your settings.
Now, the question is, how can you increase the speed of your computer without adding more RAM? For the record, ever since we were taught about computers, we were told that RAM is what makes a computer fast.
Added to that, getting into gaming and building your own PC made you believe the more RAM you have, the faster your computer will perform. Well, undoubtedly that all is true! However, there are certain things one can do to speed up their PC/Laptop without needing to add more physical RAM.
The following article will list all the possible ways one can speed up their PC/Laptop without having to add more RAM to it. Let’s dig in…

Importance of a high-speed RAM in PC performance
For starters, a memory that can be accessed in a random fashion is known as random-access memory (RAM). Memory works as a buffer between your primary storage (i.e. hard drive/SSD) and the CPU. So, the faster the RAM or your system’s memory, the faster will be the data fed to your CPU.
When data processing takes place, a computer’s random access memory (RAM) acts as a temporary digital workspace where programs may be placed. As a direct consequence of this, the processor in your computer is able to quickly and easily get access to the data that is important to the current circumstance.
If your system has a slower RAM that means it will take a longer duration of time to record and fetch the information. Now, the slow or fast speed of RAM will depend on your CPU and its requirements. So, this is completely a subjective matter.
A slower RAM with a powerful CPU can impact the performance in many ways. Even in gaming, RAM plays an important role. CPU bottleneck can be caused by a slower RAM and this is the worst thing you can have with a powerful CPU.
8 Steps to enhance system performance without increasing RAM
The following are steps to enhance your system’s performance without having to add any more physical RAM:
1. Get rid of programs that are draining your RAM.
We all know that Windows has features that will show you what programs and processes are utilizing your RAM, so you won’t have to speculate. To get started, launch the Task Manager either by doing a search for this in the Start menu or by using the keyboard shortcut Ctrl + Shift + Esc.
In the event that you want a more comprehensive look, click the “More information” link. After that, go to the Processes tab and select the memory heading to arrange the running processes in descending order of their memory use. Remember to keep these applications in mind, as we will be talking more about them in a little while.
Also, keep in mind that more powerful applications need more RAM. So, the fact that you’re consuming a lot of RAM does not always indicate a problem. For instance, window’s default notepad application is likely to use less random access memory (RAM) than a browser that has a dozen tabs active at once.
You can disable these apps but do not mess up with the Windows programs. You can close the program which are installed by your externally. This will not close the programs permanently. They will start running after the next boot.

In order to disable these programs completely, you can go to the Services Menu in Windows and disable the programs from there. To enter the Service menu, open the Run menu by pressing Windows Key+R and enter Services.msc, and then hit enter.
There, you can easily disable the programs and enable them later on as you want. This is more like a tool for disabling the background processes such as Automatic Windows Update. So, don’t enter this menu if you are not confident using it.

2. Uninstall non-utilized software
Once you know which applications on your system consume the most random access memory aka RAM, you may then consider whether or not you really use them. On the brighter side, you may easily limit the amount of RAM that is being used by your computer by ensuring that apps that you never use anyhow are prevented from utilizing it.
You should get rid of any applications that are still running in the background despite the fact that you haven’t accessed them in weeks or months. The reason why you must do this as they are only wasting valuable resources (memory) on your computer.
To perform the same, consider the steps below:

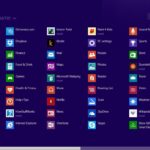
Step 1: Head on to your PC settings.
Step 2: Now, look for the Apps menu.
Step 3: Once found, select the Apps & features option.
Step 4: Lastly, click the Uninstall button next to each program that you wish to delete.
3. Limit which application starts when you bootup
A great number of programs have the possibility of installing new processes on your computer that will run automatically each time you switch it on. These processes will start when you first turn on your computer. There is a possibility that your computer does not always need to have all of these programs running in the background. These startup apps will hugely impact the booting time of your OS.
To sort this, head on to your system’s Task Manager. You may access it in the fastest and most comfortable manner by just pressing Ctrl+Shift+Esc keys simultaneously. We recommend you this way as it is easy.
Now, you will be able to see a list of all the programs that startup with Windows. To be precise, this info is visible below the Startup tab in the Control Panel. Also, there’s a dialogue box that includes a column of useful insights. It reveals to you the impact that each program will have on the process of starting up the application. In the Status column, there is information that indicates whether or not the application is enabled to run upon startup.

Limit these applications as per your requirements, and you’re all set!
4. Clean up your drive
First things first, go to the Start menu and type “Disk Cleanup” to start the dependable program that has been part of Windows for a number of revisions of the operating system. In case you did not know, Disk Cleanup scans your computer for unnecessary files and offers to remove them all at once, including temporary files, offline Web sites, and installation programs.
Recycle bins aren’t necessarily bursting at the seams until they’re close to being entirely full, which may have a big influence on the speed of your computer.
You may search for the Optimize Drives utility by typing the name of the application into your search box next to the Start button. Optimize Drives may be used if you don’t intend to defragment your discs on a regular basis. Also, defragmentation is unnecessary if your computer’s main storage device is an SSD since there are no moving parts involved in the reading process.
5. Remove tips and notifications.
Tips is a Windows 10 functionality similar to Apple’s iOS app. If you’re currently on Windows 10, you’ve already had the opportunity to learn about the latest and most useful features of the operating system.
For starters, it demonstrates several approaches to completing a task. There are instances when it is beneficial to learn about new Windows functions, but you must be aware that it can slow down your PC. It’s simple to switch off the Tips app if you’re already thorough with the latest features of Win 10 and its functionalities.
Consider the steps below to do the same:
Step 1: Go to Start & open the Options app.
Step 2: Now, pick the System group of settings, and then the Notifications & actions tab.
Step 3: “Show me advice about Windows” will be turned off at the bottom of the Notifications area as you use Windows.
Before disabling this option, consider whether or not these recommendations are valuable and whether or not you really need them. For the record, as with turning them off, re-enabling them is a pretty simple process.
6. Turn off your visual effects.
You can make your computer run faster by turning off certain of its visual effects. These effects are working extremely hard to ensure that the display is comfortable for the user’s eyes. If the power consumption of your desktop PC is minimal, you could choose to change the trendy theme of your os system in order to get some additional speed in order to complete a certain task.
To access the system properties in Windows 10, consider the steps below:
Step 1: Right-click on “This PC” icon on your desktop home screen.
Step 2: Then, choose “Properties.”
Step 3: Now, Click on “System.” In the left pane of the window that appears, you will be able to see “Advanced system options”
Step 4: Now, It shows in the dialogue box labeled “System Properties,” and it is already on the advanced tab.
Step 5: There are three settings buttons; the one you need to click is the Settings button located in the Performance box.
Step 6: Immediately after this, a new dialogue box titled “Performance Options” opens. You have the option of selecting “Adjust for optimal performance” under the Visual Effects tab, where some of the settings may be checked or unchecked.
Step 7: In the last step, close the dialogue box by clicking “OK” followed by “Apply.”
7. Use Performance Mode
You can pretty easily switch between Windows’ power-saving mode and performance mode. For that, right-click the battery icon in the taskbar. Choose the option Power Options. Just make sure the selected power plan is Performance instead of power-saving.
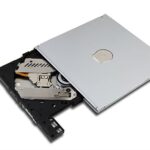
8. Install an SSD (Most Underrated Method)
This is amazing and the most underrated upgrade for PC performance. You know we discussed that the RAM works as a buffer between the CPU and primary storage. So, people often think that the reason why their system is becoming sluggish is that the RAM is slow. But, most of the time, they will be using the hard disks as their primary storage.
The hard drives tend to slow over time. The best way to observe it is to notice the time taken by your system to load up. If it is taking so long, it probably means your primary storage is causing the issues.
SSDs are becoming cheaper and cheaper and it is easy to upgrade to a new one. Make sure to check the SSD compatibility before purchasing the one for you. An SSD will make sure that the RAM is getting all the required data on time and not getting bottlenecked because of a slower storage drive. You can read this buying guide to buy the right SSD for your system.
When should you really upgrade your RAM?
If you were getting all your work done perfectly earlier but the system has recently started getting sluggish, you will most probably get the problem fixed by an SSD upgrade. In that case, you do not have to install a new RAM. SSD upgrades are just underrated but highly impressive and I would highly suggest you do that if you think your system is still capable of doing its job.
However, upgrading to a faster or a higher-storage RAM can be important when you have to do some other and especially new things. For example, using new software that demands more RAM or a faster RAM. In that case, you should definitely upgrade to a new RAM.
Make sure to check your CPU and motherboard specifications to pick the right kind of RAM. You can read this RAM buying guide for more information.
Wrap Up
Now, we can finally say that you don’t need to add more RAM to your system to make it faster. All you need to do is just need to clear up the unnecessary junkies that are using your existing RAM. Upon doing so, you free up more space for other utilities to work which in turn makes your system run faster and not feel sluggish. But, if the problem is not getting resolved, you always have the option to upgrade your storage first and then the RAM itself.
Let me know what you think about it!

I am Anshul Rana, an experienced author specializing in PC gear reviews and Windows 10 software tutorials. With a strong passion for technology and an in-depth understanding of the PC industry, I provide insightful and detailed analyses of computer peripherals, gaming gear, and software solutions. My writing style is concise yet informative, making complex topics accessible to both beginners and advanced users. Through my reviews and tutorials, I aim to offer valuable guidance, helping readers make informed decisions to enhance their PC experience and explore the vast possibilities of Windows 10 software.