If you neglect driver updates for your NVIDIA GPU, the driver would become obsolete and NVIDIA Container high disk usage is one of the consequences. To bring the disk usage of NVIDIA Container back to normal, you must update the graphics card driver. Other solutions include uninstalling and reinstalling the NVIDIA GPU driver, disabling GeForce overlay, restarting NVIDIA services, renaming NVIDIA Container, running a malware scan, etc. Read to the end to free up resources and use your graphics card to good effect.
NVIDIA Container Using Too Much Disk: Breakdown
Generally speaking, NVIDIA Container uses little resources in most of the cases so Windows users don’t have to worry about it. Still, if you notice NVIDIA Container high disk usage in Task Manager, you need to take these possibilities into account:
- Out-of-date driver.
- GeForce overlay.
- NVIDIA services.
- NVIDIA Container
- Malware.
How To Reduce Disk Usage Of NVIDIA Container
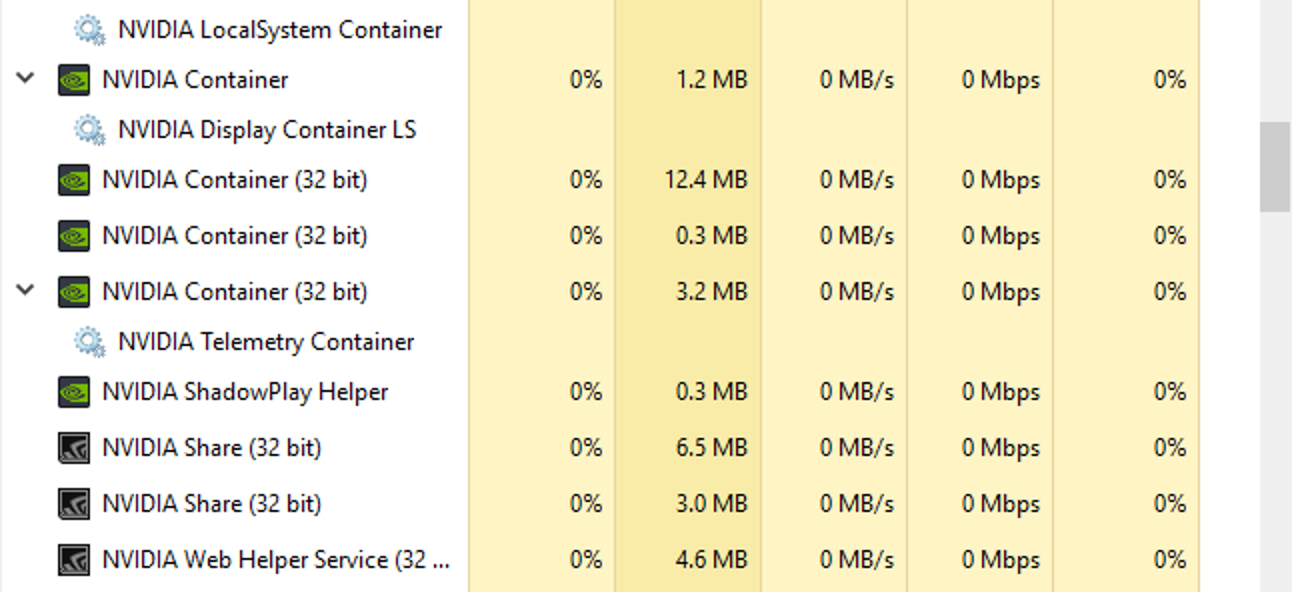
![]()
Update Driver
- Step 1: Go to Search bar, type devmgmt.msc and press Enter.
- Step 2: In Device Manager, expand Display adapters, right-click your NVIDIA GPU and pick Update driver.
- Step 3: Follow on-screen instructions to update the driver.
- Step 4: Restart your computer after the process finishes.
- Step 5: When the screen comes back on, open Task Manager and determine whether the issue persists.
Note: If you have NVIDIA GeForce Experience on your PC, you could use it to update the display driver.
- Step 1: Launch NVIDIA GeForce Experience.
- Step 2: Go to Drivers tab then hit CHECK FOR UPDATES.
- Step 3: If a driver update for your graphics card is available, download and install it
- Step 4: Restart your computer.
- Step 5: See how things turn out.
Alternatively,
- Step 1: Launch your web browser then visit the official NVIDIA website.
- Step 2: Locate the latest driver for your GPU and download it.
- Step 3: Right-click the downloaded driver setup then pick Run as administrator.
- Step 4: Follow on-screen instructions and restart your computer.
- Step 5: Witness the result.
Uninstall And Reinstall Driver
- Step 1: Open Device Manager, right-click your NVIDIA GPU in Display adapters and pick Uninstall device.
- Step 2: Check the checkbox next to Delete the driver software for this device before hitting OK.
- Step 3: Restart your computer.
Disable GeForce Overlay
All in all, while many people find the GeForce overlay helpful, it could cause issues on occasions. Hence, once it comes to NVIDIA Container high disk usage, you should disable GeForce overlay.
- Step 1: Launch NVIDIA GeForce Experience.
- Step 2: Hit the gear icon near the top.
- Step 3: Toggle off the switch next to IN-GAME OVERLAY.
Note: Depending on the situation, you should consider getting rid of GeForce Experience.
- Step 1: Go to Search bar, type Control Panel and press Enter.
- Step 2: In Control Panel, change View by to Category then hit Uninstall a program under Program.
- Step 3: Locate GeForce Experience, right-click it and pick Uninstall.
- Step 4: Follow onscreen instructions.
- Step 5: The moment the process completes, restart your computer.
Restart NVIDIA Services
- Step 1: Go to Search bar, type services.msc and press Enter.
- Step 2: In Services, locate each of the NVIDIA services and pick Restart.
- Step 3: Allow the process to go all the way.
Rename NVIDIA Container
- Step 1: Right-click an empty space on the taskbar and pick Task Manager.
- Step 2: Locate NVIDIA Container, right-click it and pick Open file location
- Step 3: Right-click the executable file nvcontainer.exe/nvdisplay.container.exe pick Rename and give the file a new name.
Run A Malware Scan
- Step 1: Open Start menu, locate the gear icon and hit it.
- Step 2: In Settings, select Update & Security then choose Virus & threat protection in Windows Security.
- Step 3: Click Scan options, pick Full scan and hit Scan now
- Step 4: Once the process wraps up, restart your computer.

As PCWorld’s senior editor, Mark focuses on Microsoft news and chip technology, among other beats. He has formerly written for PCMag, BYTE, Slashdot, eWEEK, and ReadWrite.